I was charged for Azure even though I had the grant. What happened?
The Microsoft grant is valid for one year. The renewal process is simple, but if it’s not completed, Microsoft will start billing the services running on the account.
The steps below are a guide for renewing the grant and requesting a refund.
Grant Renewal
To do this, go to the Azure page on the Microsoft Nonprofit portal and reactivate the grant from there.
This is basically the last set of steps from Step 2 in the Azure guide:
👉 https://wf.ngohub.ro/en/tutorial-getting-azure-credits
Requesting a Refund for Already Issued Invoices
After completing the renewal, open a ticket with Microsoft Support.
The process is a bit more complex, so below you’ll find the instructions to go through all the steps.
Step 1
Finding the support tickets

1. Go to the Help & Support page
Search for “Help” and click the icon that says “Help & Support”

2. Click the "Create a support request" button
Step 2
Creating the support tickets
3. On the panel to the right, you’ll get to the support ticket creation page
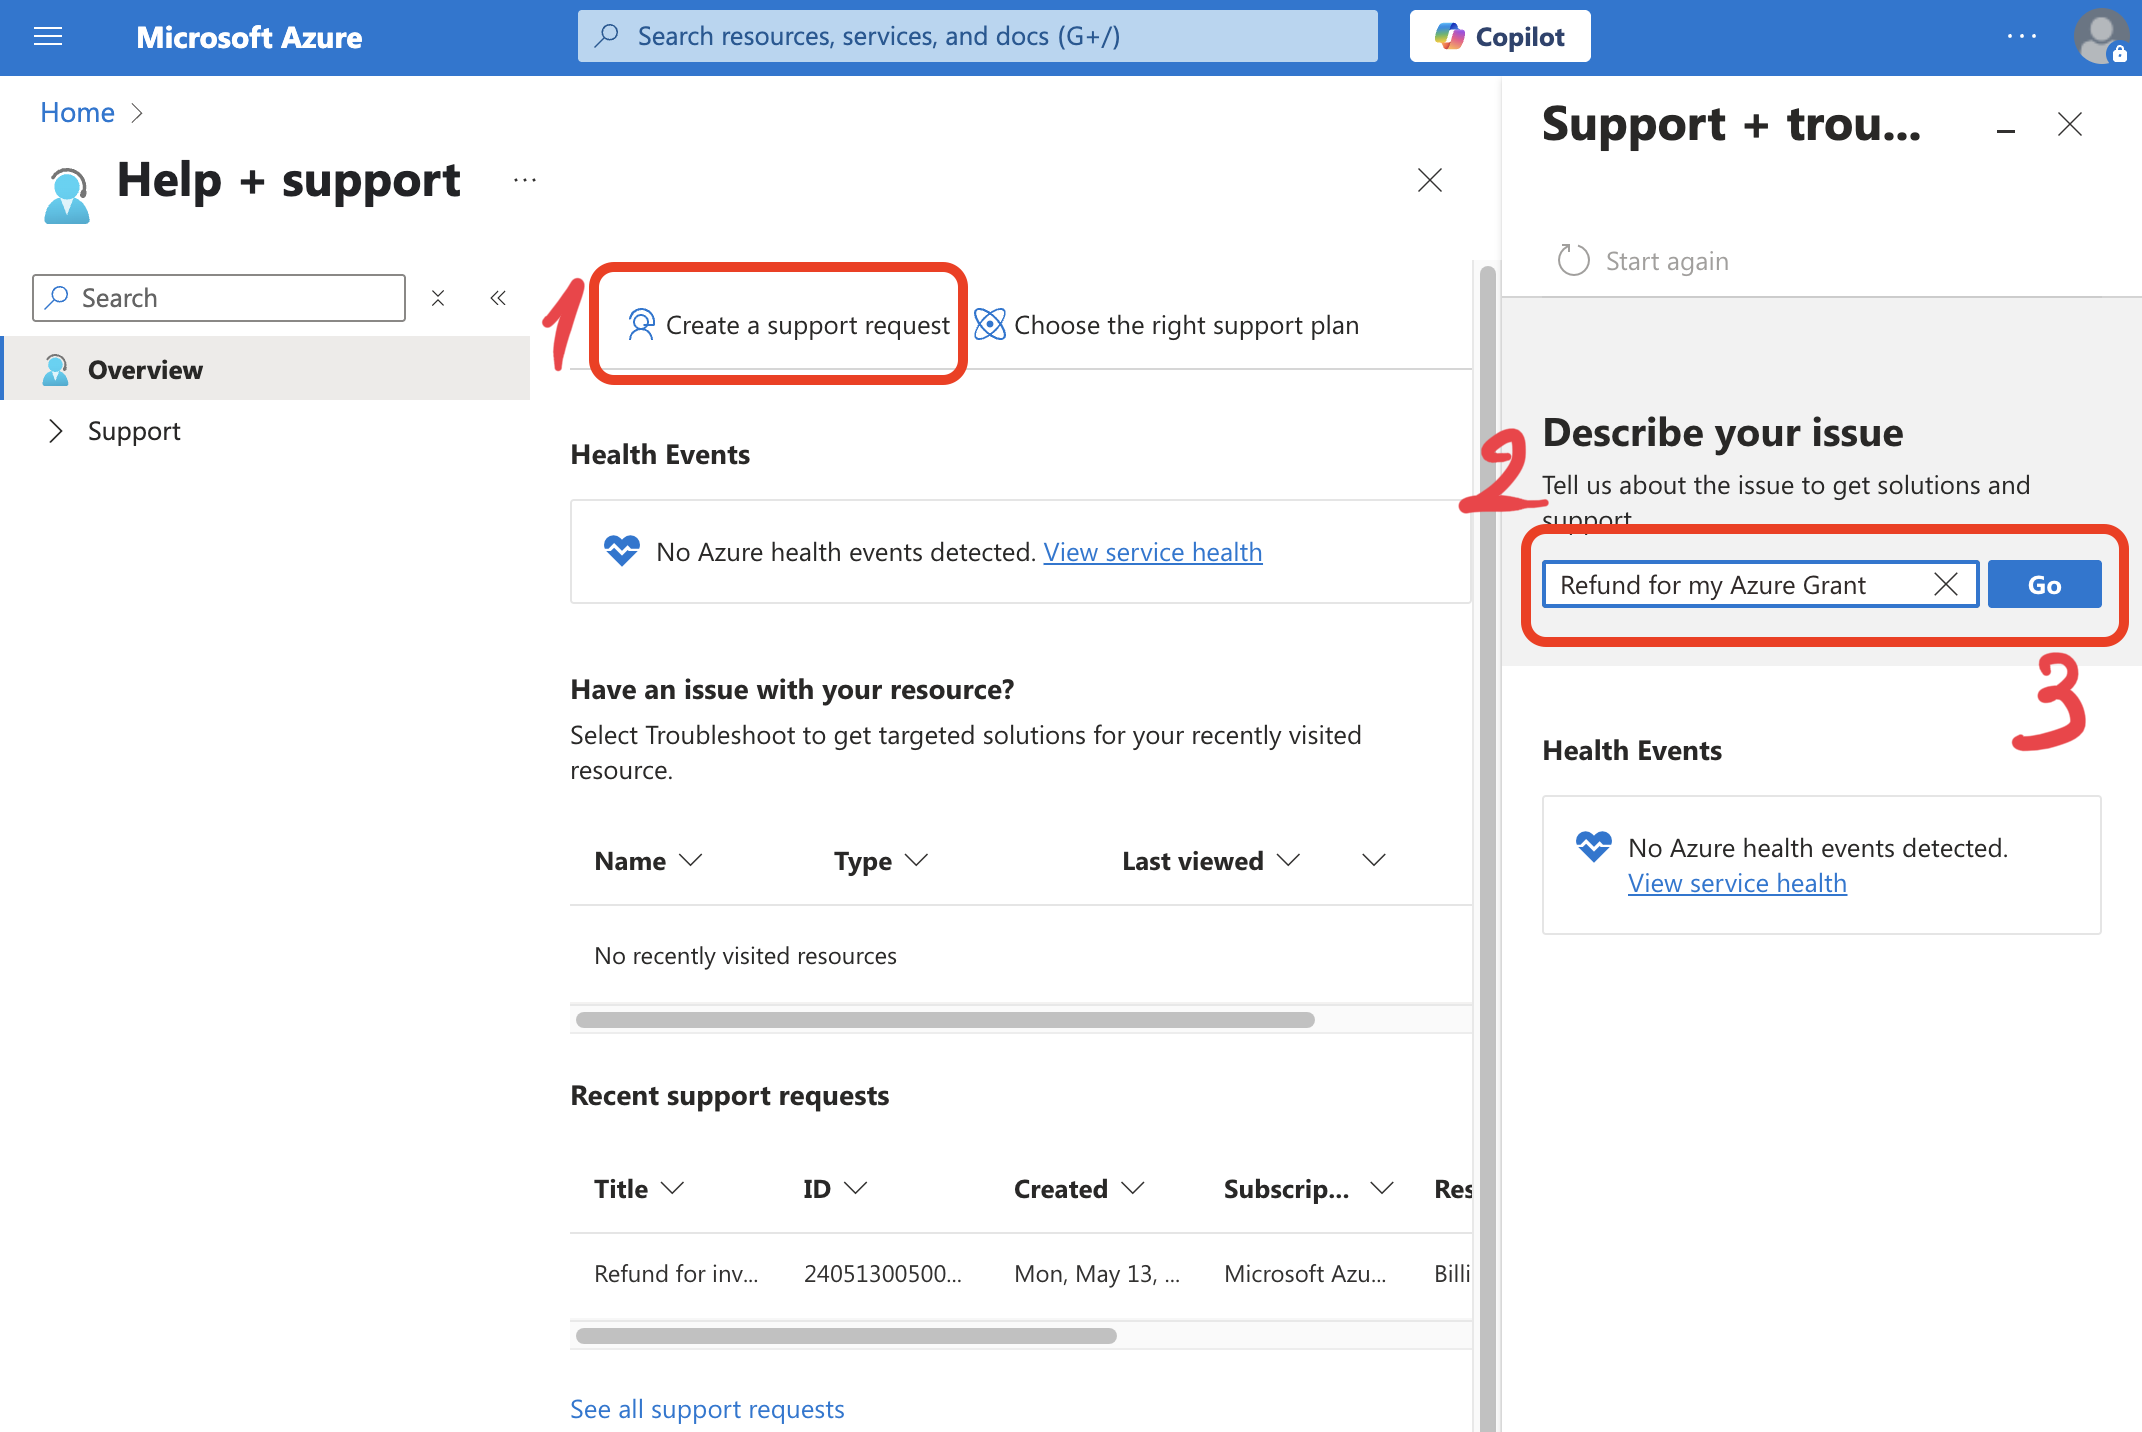
3.1 Enter "Refund for my Azure Grant" and press "Go"
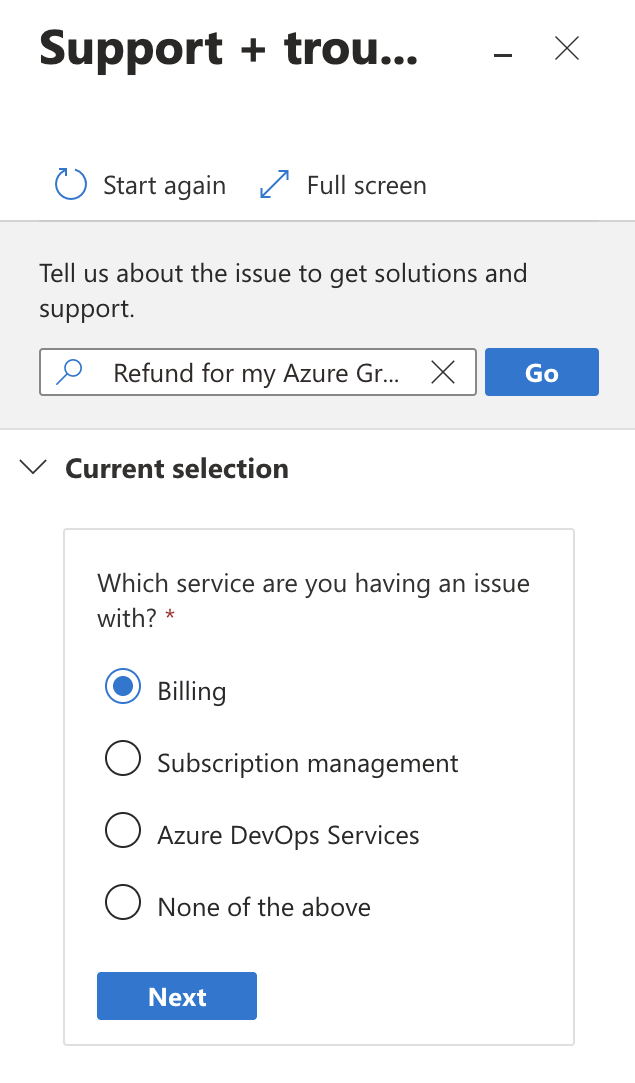
3.2 For "Which service are you having an issue with?", select "Billing", then click "Next"

3.3 For “Which subscription are you having an issue with?”, select the Azure subscription you were charged on and click “Next”
3.4 Azure will try to offer solutions based on what you’ve entered so far. From experience, even though it might say a refund procedure exists, it often doesn’t work in these cases, so you need to move forward and manually contact support.

3.4.1 Scroll down to the bottom of the panel

3.4.2 Click on the “Contact support” tab

3.4.3 Click on the “Create a support request” link at the bottom
4. Now you should be on the actual support ticket creation page
From here, you’re almost done.

4.1 Complete the fields in the first section with the following options
These are dropdowns where you must choose from the available options
"What is your issue related to?" → Select "Azure services"
"Issue type" → Select "Billing"
"Problem type" → Select "Disagreement with a charge (workload or service)"
"Problem subtype" → Select "Issue with charges across multiple services"
Make sure that the correct subscription appears in the "Subscription" field and that the "Summary" field contains the earlier text ("Refund for my Azure Grant").
Finally, click "Next"

4.2.1 Microsoft will again try to offer a recommended solution.
Click the button in the top-left corner.

4.2.2 Then click Next.
Usually, these are the same suggestions from step 3.4 (which don’t help us).
4.3 Now you’re in the section where you actually describe the issue and request support.

4.3.1 Fill in the following information:
“Problem start date” → Use the date when the invoice was issued / when the Azure grant expired
“Subscription ID” → Enter the ID of the subscription(s) where you have resources and incurred costs
“Invoice ID related to the issue” → Enter the invoice ID issued by Microsoft
In the problem description, paste the following text:
Hello,
I have a nonprofit Azure account and have been using the Azure grant. Unfortunately, I missed the renewal date and was charged for the services running on my account. I have now asked for a renewal and there shouldn’t be any extra charges in the future, but I would like to request a refund for the charges from when the grant expired.
Considering that the status of the nonprofit has not changed in this period, we have remained active and only forgot to renew the grant, we would still qualify for the grant, just didn’t benefit from it.
We are sorry for the misunderstanding and hope this shouldn’t be an issue and that you can refund all of those costs.
Thank you for your time and consideration.
You can check “Yes” for the question: “Allow collection of advanced diagnostic information?”

4.3.2 Scroll to the next section and choose email support, then fill in your and your organization’s details.
Add support [at] code4.ro or support [at] commitglobal.org as an additional email.
Click “Next” to create the new ticket.

5. Double-check all the entered information and, if everything looks good, click “Create”
What happens next?
Microsoft will follow up by email to request more information or resolve the issue directly.
We’ll also be included in the email thread and can help you if needed.