STEP 0 — Optional (Getting Techsoup)
-
Create an account on the TechSoup platform (choose your country from the dropdown menu on the left side of the screen)
Microsoft used to use TechSoup to verify your identity as an NGO. While they no longer do this, we still recommend you use TechSoup for the resources they provide to nonprofits.
STEP 1
Apply for Microsoft Azure credits
How to get free credits?
Create a Microsoft for Nonprofits account by filling out the following form: https://signup.nonprofit.microsoft.com/en-us/welcome-policies
⚠️ Make sure you use the link above and don’t create a personal Microsoft account
Prerequisites before registering
a valid phone number
a valid email address — make sure it’s one from the organization and not of one of the members’
the organization’s website — if you don’t have a website yet, use one of the social media pages (e.g., Facebook, Instagram, etc.)
an English text about the mission of the organization
the Fiscal Registration Code (for Romania, the CUI / CIF)
the Fiscal Registration Certificate (proof of registration) in jpeg, jpg, png, or pdf, smaller than 2MB
Contents of the Microsoft form
1: Organization contact details and agreement to Microsoft for Nonprofit policies
2: Information about the organization
3: Verification of the phone number to secure the account
4: Create the account
Available tutorials and guidance
You can either go through the tutorial for step-by-step visual instructions on the activation process or follow the steps described by us below
Sign in to your Microsoft for Nonprofits account and go to the following URL: https://nonprofit.microsoft.com/en-us/offers/azure
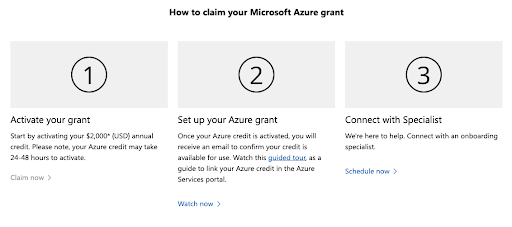
Press the Claim Now button on the dedicated Azure page (see the picture below; the button should be blue for you)
Click the Activate Now button in your email from Microsoft for Nonprofits to the email address associated with your Microsoft for Nonprofits account.
Microsoft for Nonprofits account created
Allow 48 hours after receiving the Microsoft for Nonprofits approval before proceeding to step 2
Optional: If this was all too easy, you can also set up SendGrid, but it's entirely optional
-
SendGrid is a service used to send emails from the site but right now, Azure has all the tools necessary for these emails. The only thing that SendGrid offers is that the communication will appear as coming from your domain (i.e., from no-reply@yourdomain.com instead of some-long-domain@microsoftazure-email-communications.com).
All of the emails sent are used to communicate with people administering the platform and no external users will see them (i.e., new member invites, forgotten password notifications, notifications for form entries).
If you know you want your emails with your custom domain, we have made some instructions and placed them here:
https://wf.commitglobal.org/en/tutorial-setting-up-sendgrid
Set a yearly reminder to renew the grant
These credits need to be renewed every year. The process is as simple as logging in and clicking “renew”.
If you forget, you will be charged for the resources until you renew and update the account configurations. The process to renew the grant before the deadline a couple minutes while the process to update after it has expired might take weeks to fix (if solvable) and may cost you.
STEP 2
Set up your Microsoft Azure account
Please allow around 48 hours to have passed before continuing from the previous step. The approval process for the grant involves a manual process, and someone from Microsoft will have to verify your eligibility.
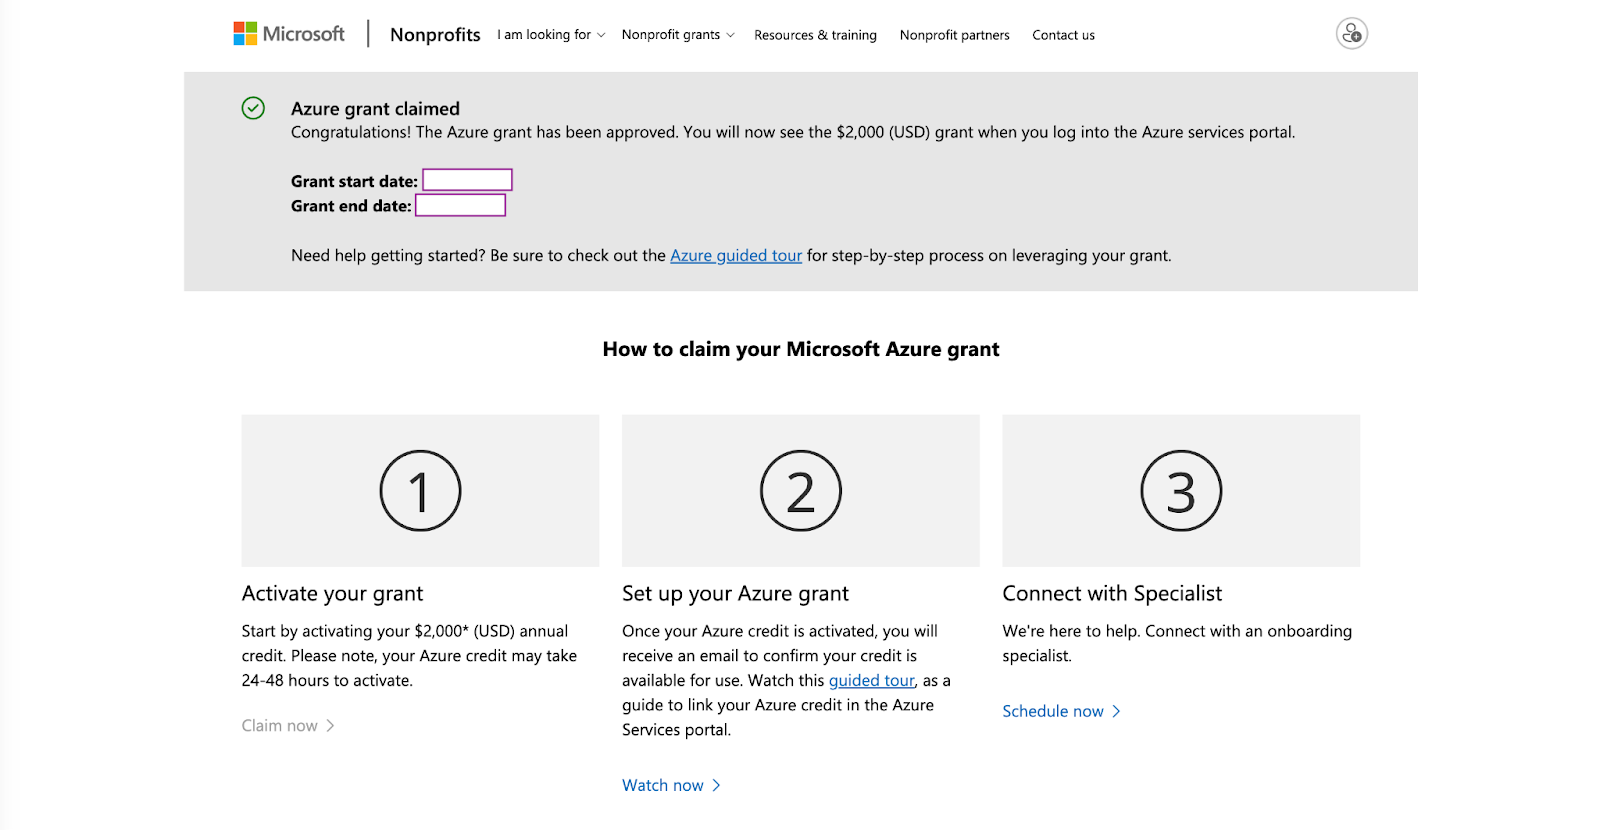
You can confirm that your grant has been approved by going to https://nonprofit.microsoft.com/en-us/offers/azure and checking that the Grant message doesn’t show an error.
After following the steps above, a few more settings are required for the Commit Global team to have access to your Microsoft Azure account and to be able to install the solution directly on your server.
New Method
If this doesn’t work, try going to the “Old Method” below. The process changes more often than desired, and it isn’t always very clear.
Log in to https://portal.azure.com/ with your Microsoft for NonProfits account
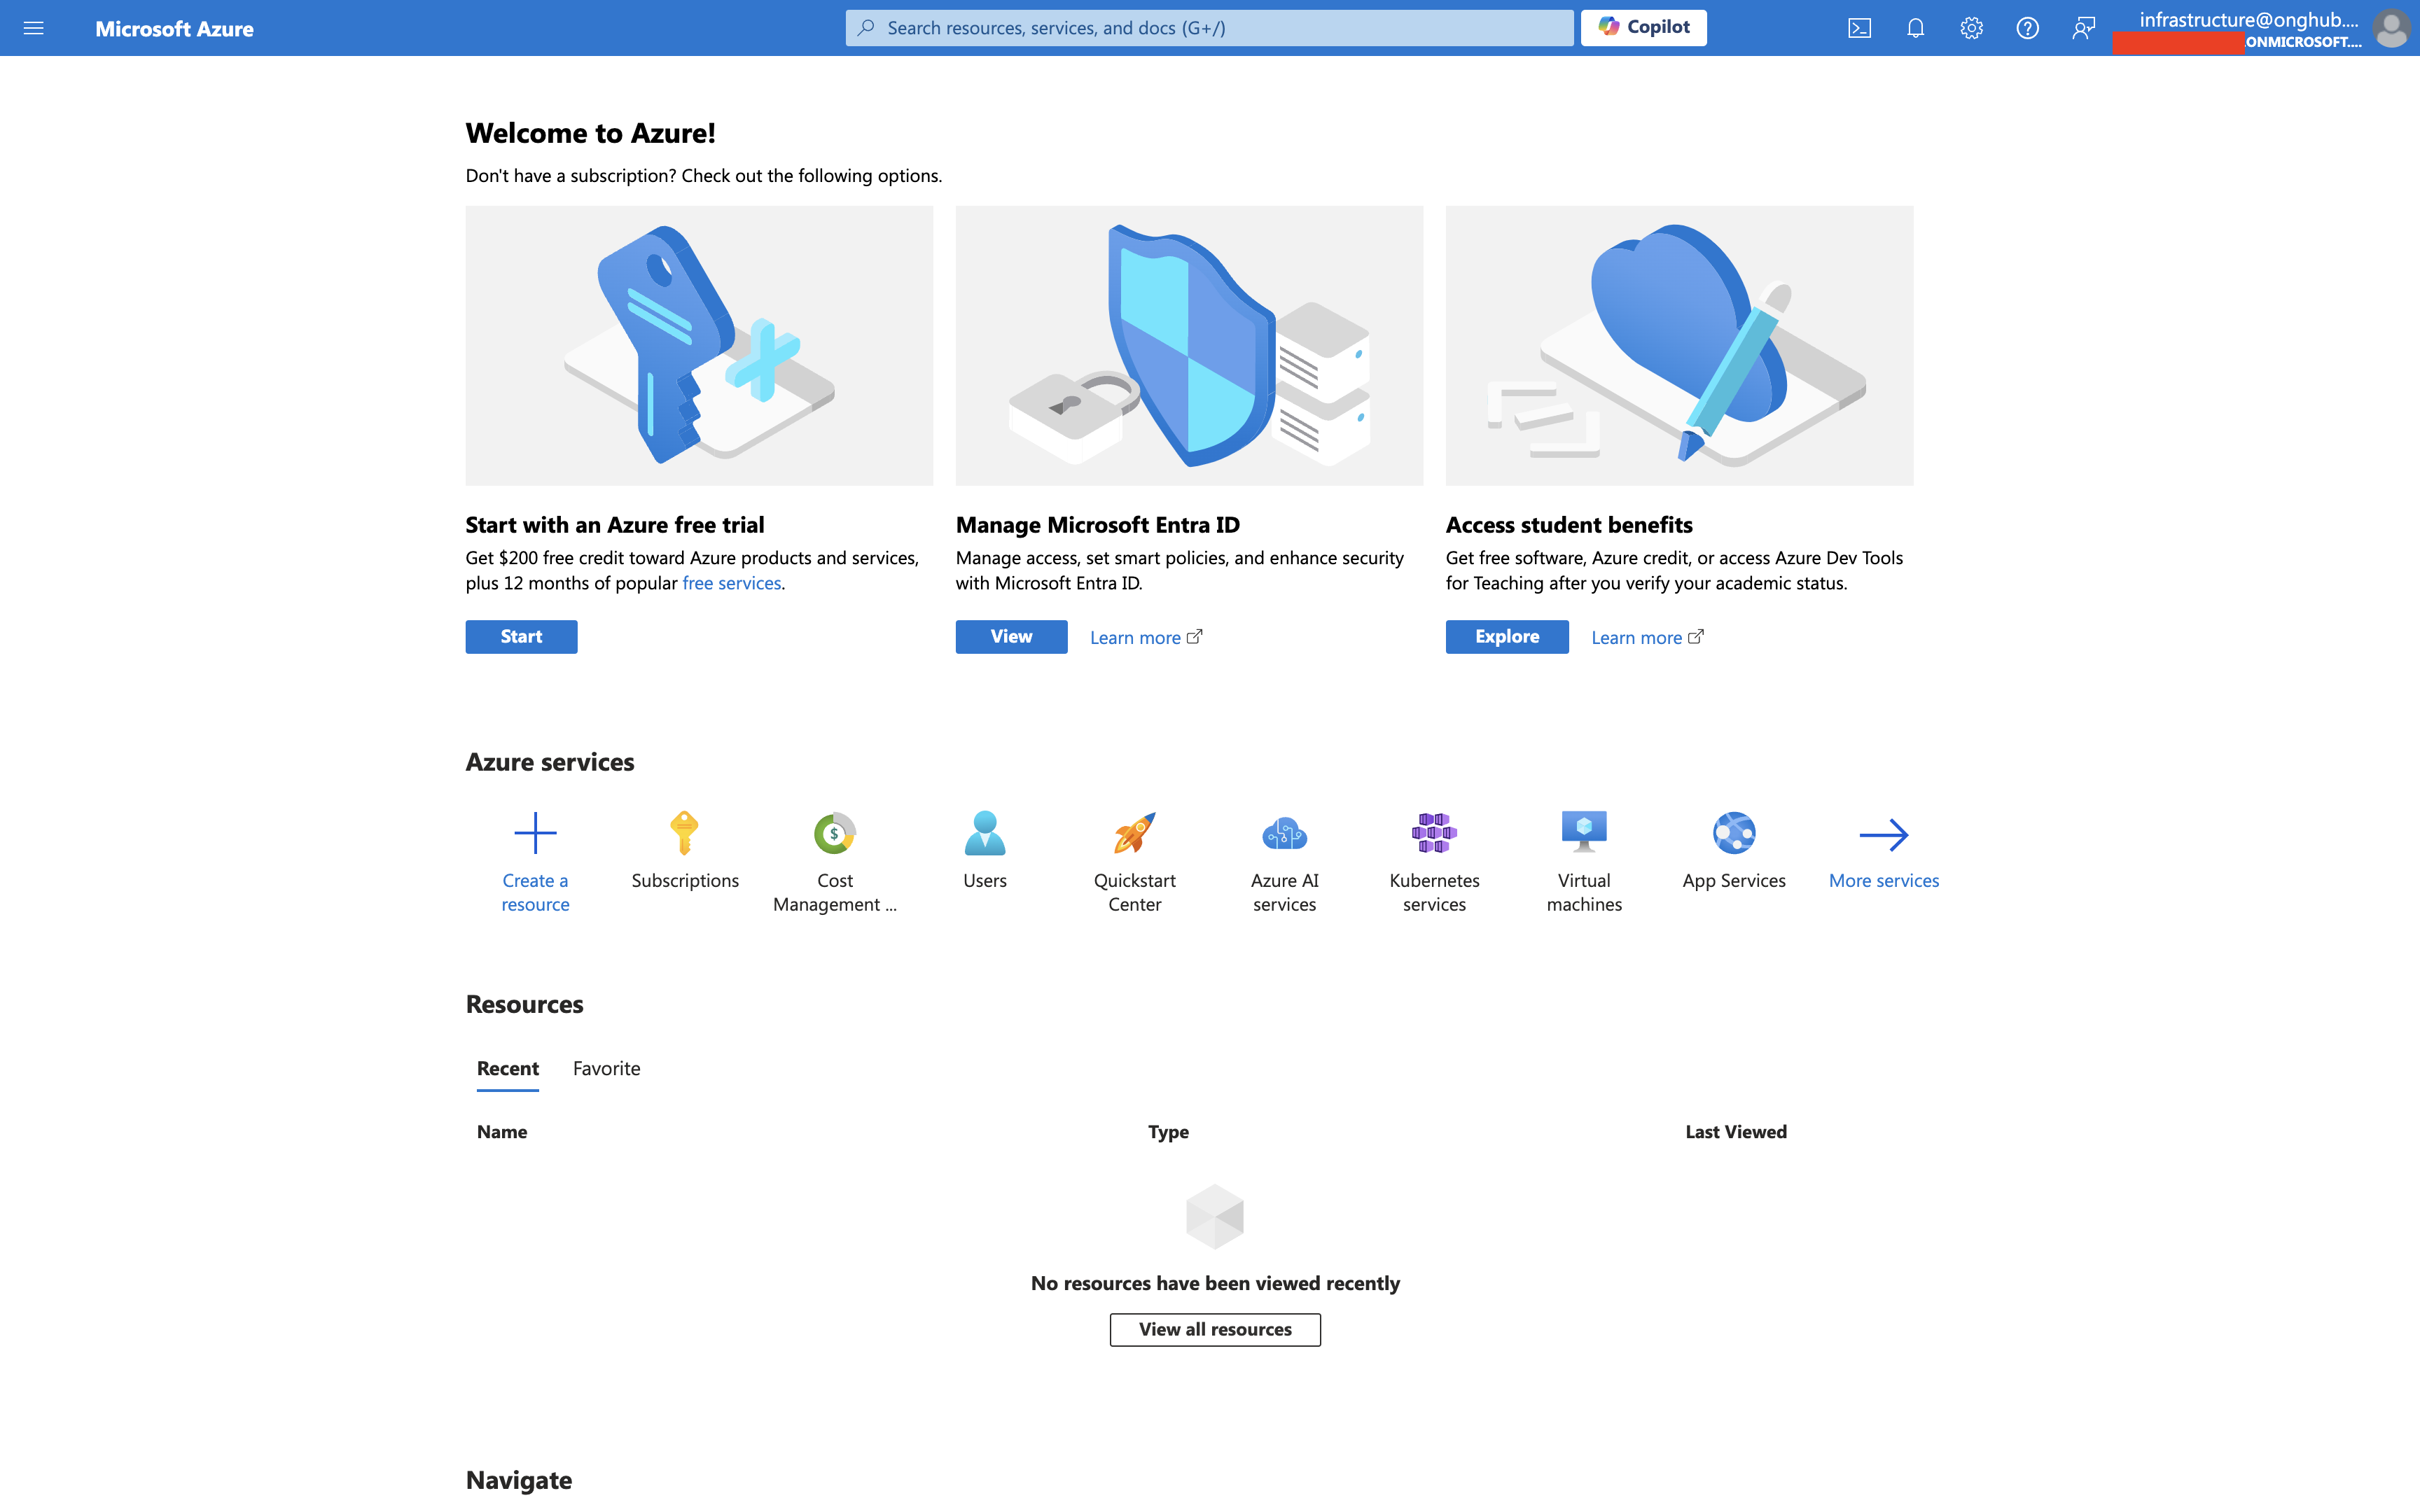
After logging in, go to this link
If it doesn’t take you to the Cost Management | Overview page, navigate to it by searching for “Cost Management” and clicking the option without “Billing” in the name.
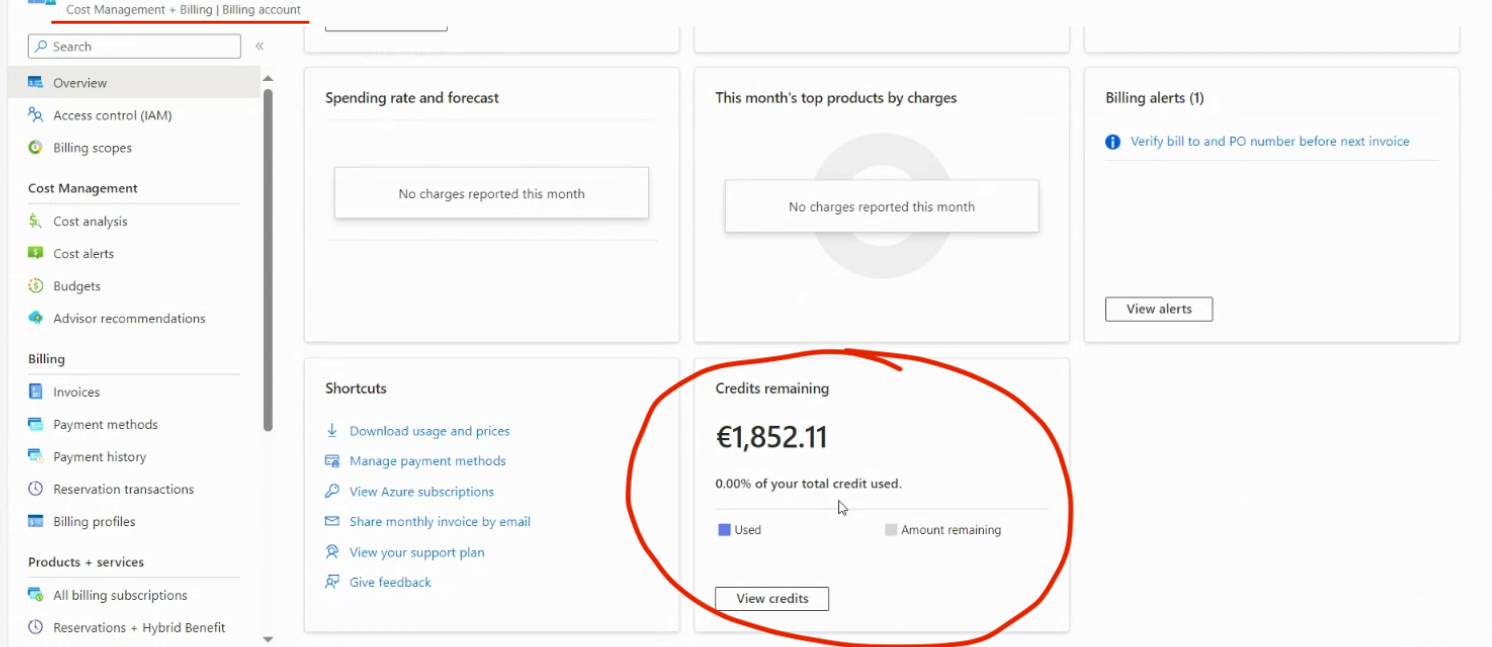
On the screen, you should see a widget with Credits remaining.
You can use the credits if this widget exists and the value is $2,000 (or another value, depending on your currency).
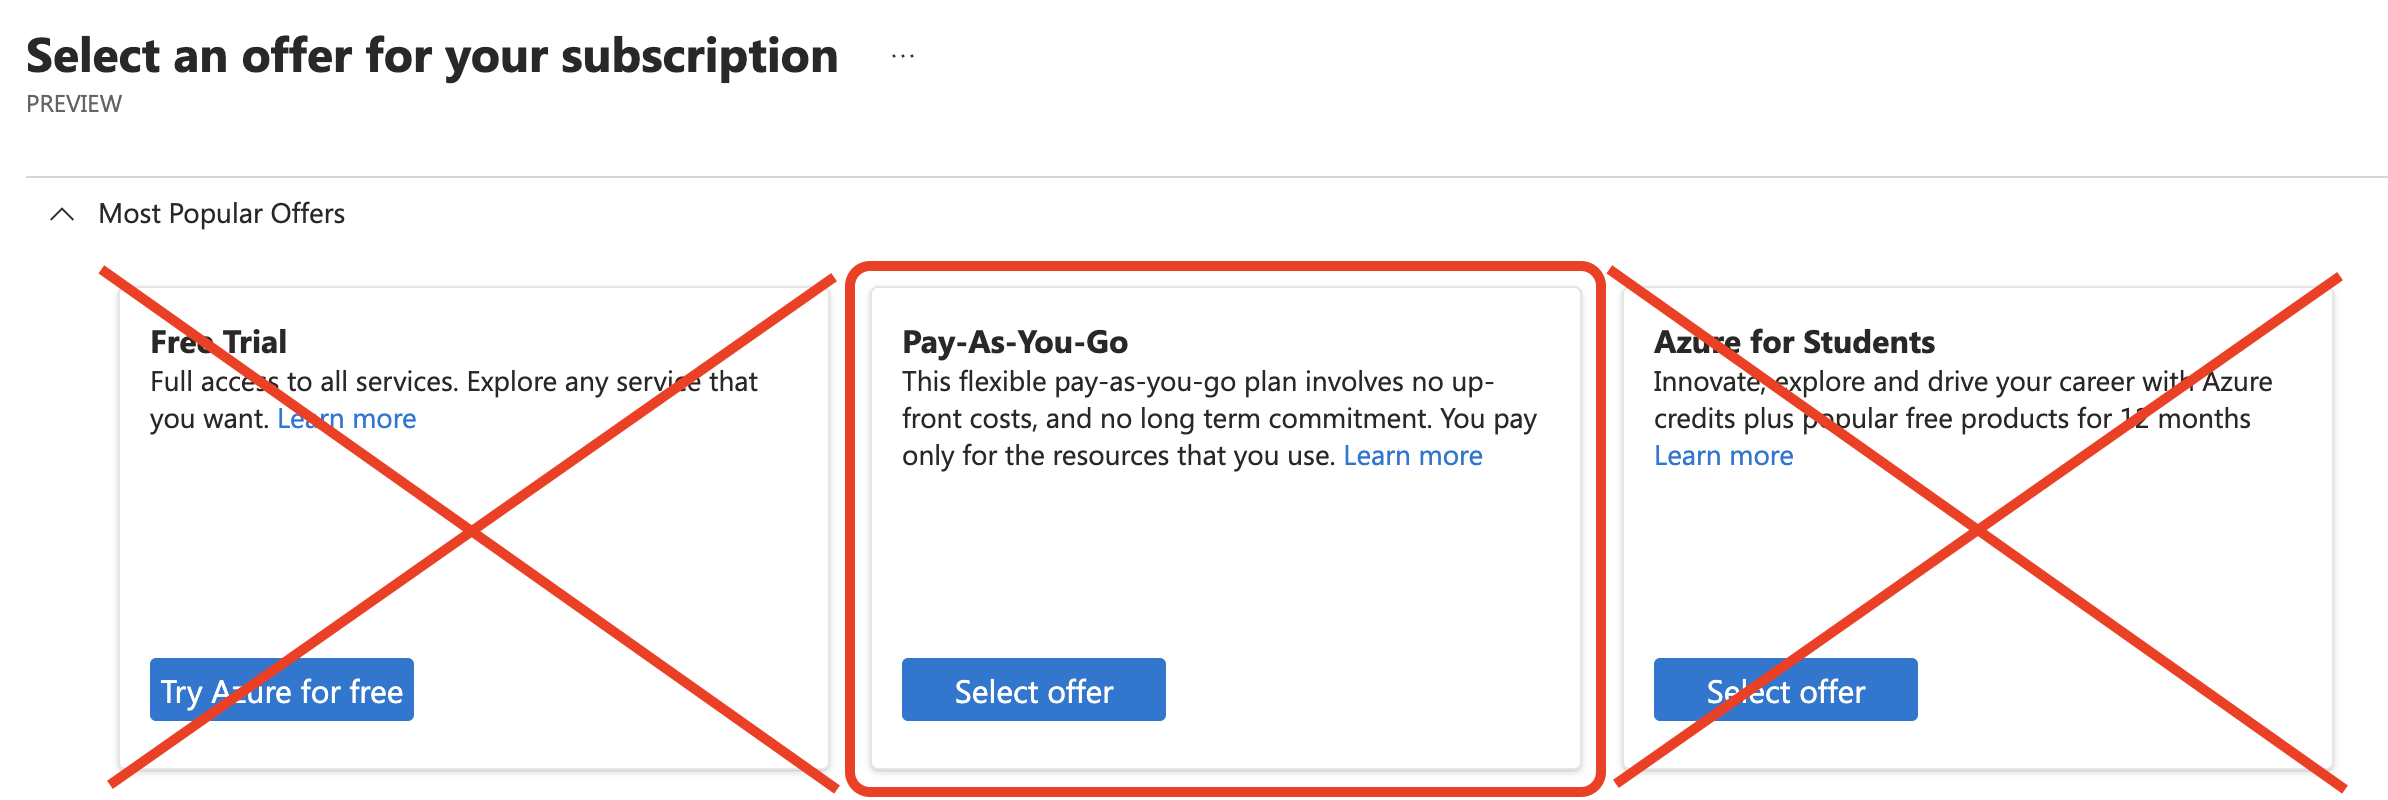
Then go to Subscriptions, click Add, and create a new Pay-As-You-Go subscription for the organization.
DO NOT SELECT A FREE-TIER SUBSCRIPTION
If the steps from the ”New Method” section don’t work, use the ”Old Method” below
Once you have completed all the steps of creating the subscription, proceed to Step 3 and add the users with the appropriate permissions.
-
Log in to https://portal.azure.com/ with your Microsoft for NonProfits account
After login, click on Subscriptions
 In the Subscriptions page, click Add, then scroll and click on All Other Offers
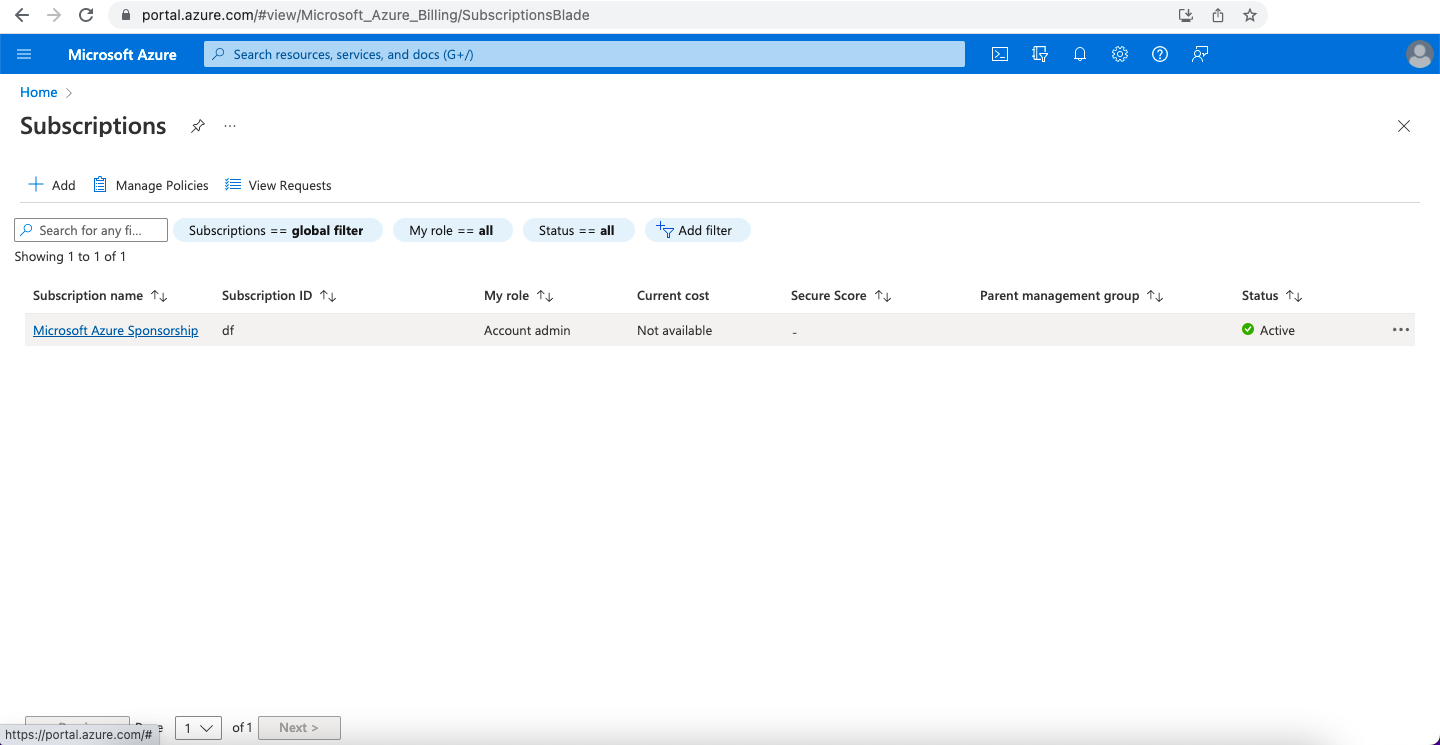
At Microsoft Azure Sponsorship, click on Check eligibility and then on Select offer
As of late, Microsoft changed its procedure for distributing credits to nonprofits. If you don’t see the Sponsorship, create a normal subscription and then check it by going to Cost Management + Billing | Cost Management and checking the Payment Methods screen shows the Azure Grant.
If the sponsorship doesn’t show “Select offer” when clicking “Check eligibility,” it means your Azure Grant was not activated. Please ensure the conditions presented at the beginning of Step 2 are fulfilled.
DO NOT select other types of subscriptions! Make sure you select a subscription named “Microsoft Azure Sponsorship.

Microsoft Azure Subscription set-up
You have activated the Microsoft Azure subscription. You are all set to start adding users.
STEP 3
Add Users
Step 3.1: Inviting the external User & assigning the right Azure role
Login in Microsoft Azure
Click on Users (or search for the menu)
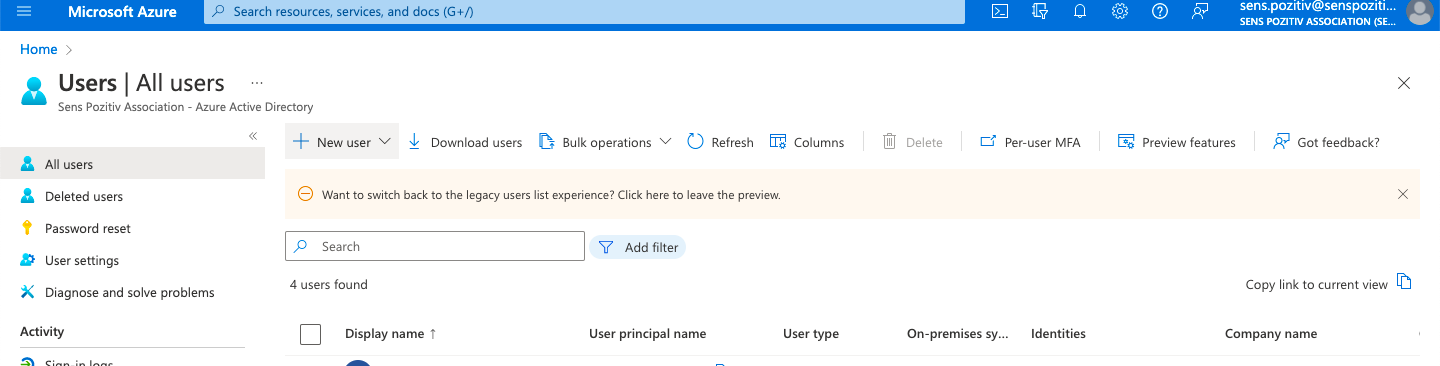
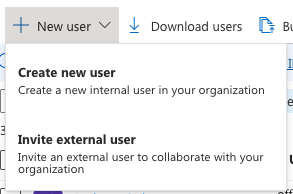
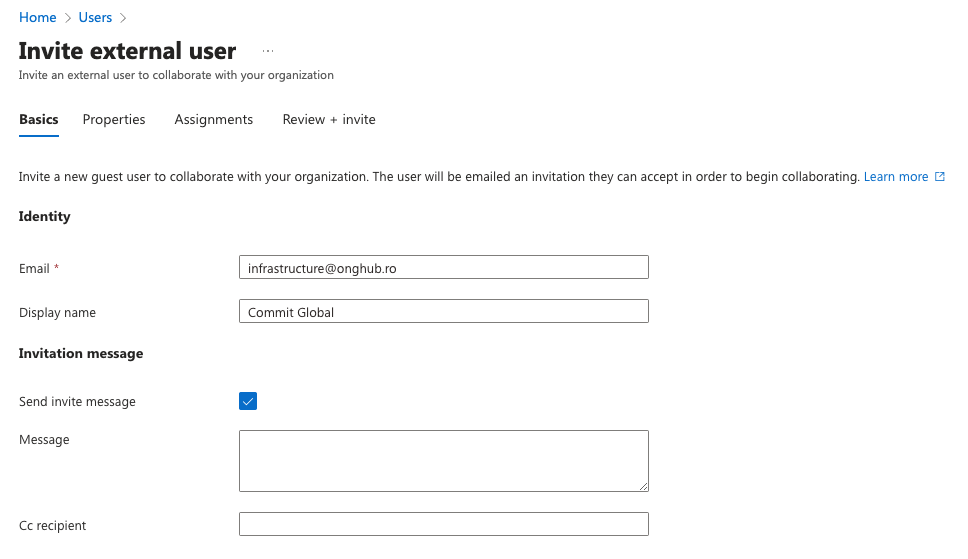
Click on New User, then on Invite external user
Our colleagues will use this account to add the website to your hosting.
Fill out the Basic information for the user
email: infrastructure@onghub.ro
Display name: Commit Global (it’s optional, you can skip it)
Make sure the “Send invite message” is checked
Go to Assignments
Click on “Add role”
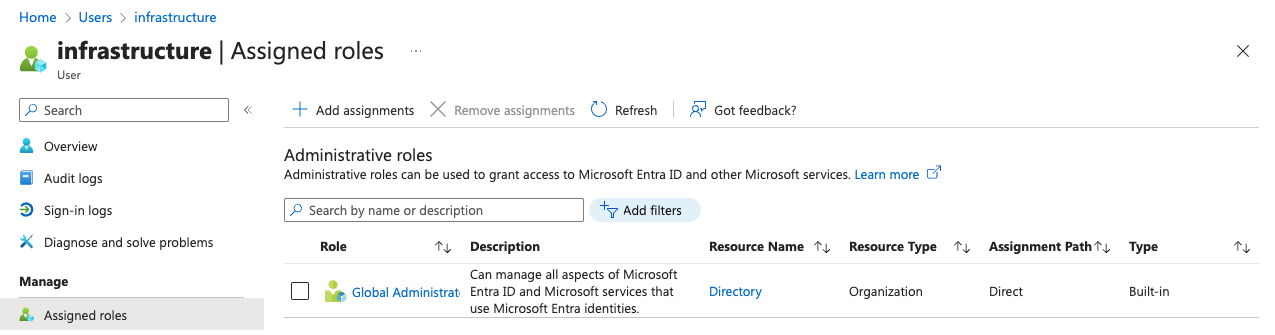
Search for “Global Administrator”
Select the role and click “Add”
Click on Review + Invite
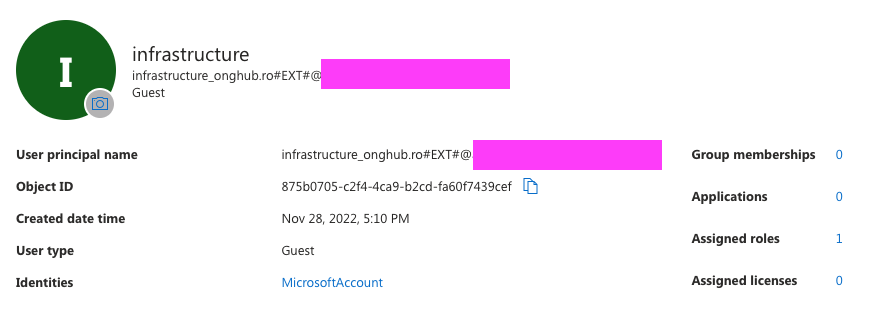
At the end, the account should look like this and clicking on the 1 from “Assigned roles
Step 3.2: Assigning the right permissions on the subscription
Go to the Subscriptions page and make sure you have a subscription there.
If you don’t see a subscription, something must have gone wrong during step 2. You need to add a Subscription to your Azure account.
Click on the right subscription. If you’ve used the New Method, you should see a subscription named “Azure subscription”, otherwise, a subscription called “Microsoft Azure Sponsorship”
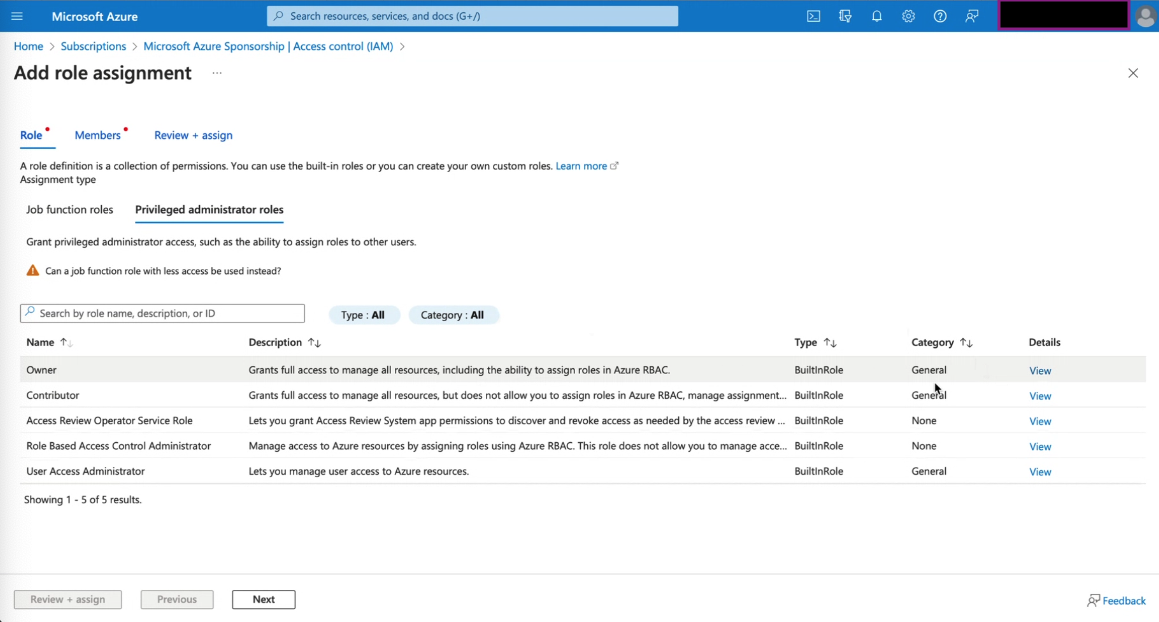
Click Access Control and Add Role Assignment
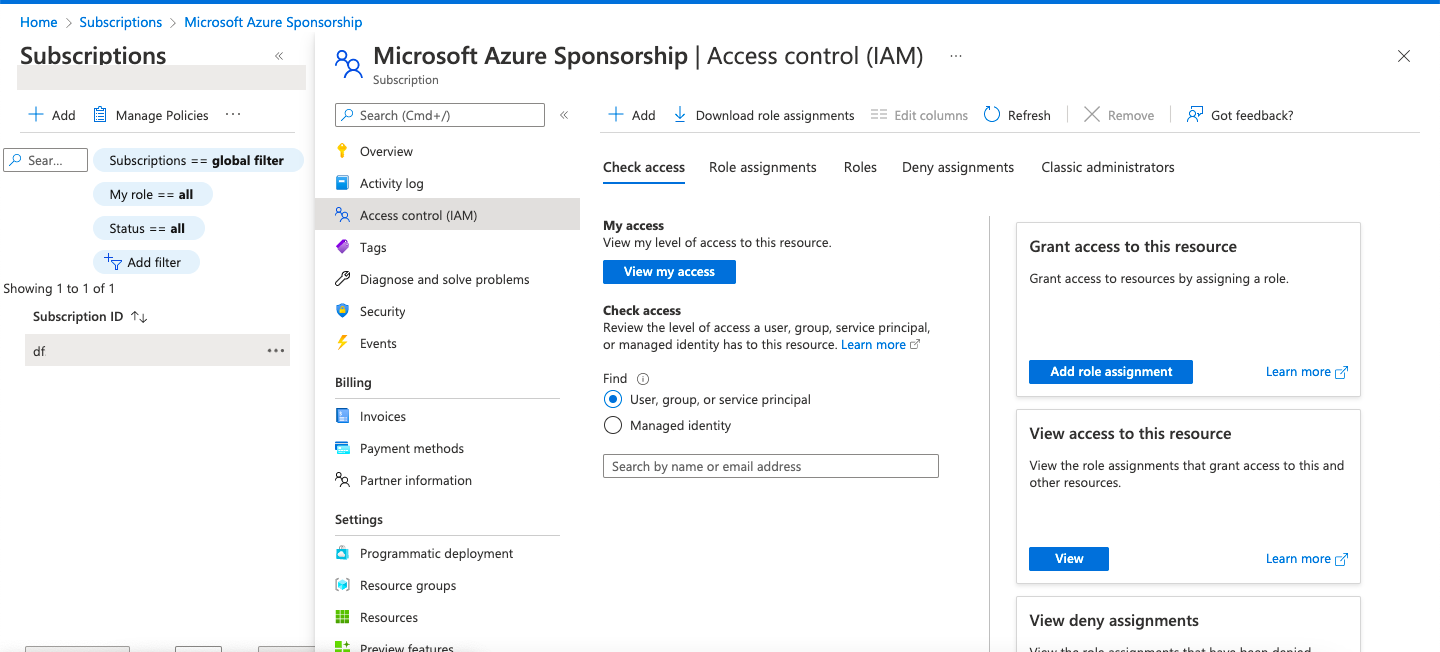
From the Privileged administrator roles tab, select Owner and click Next
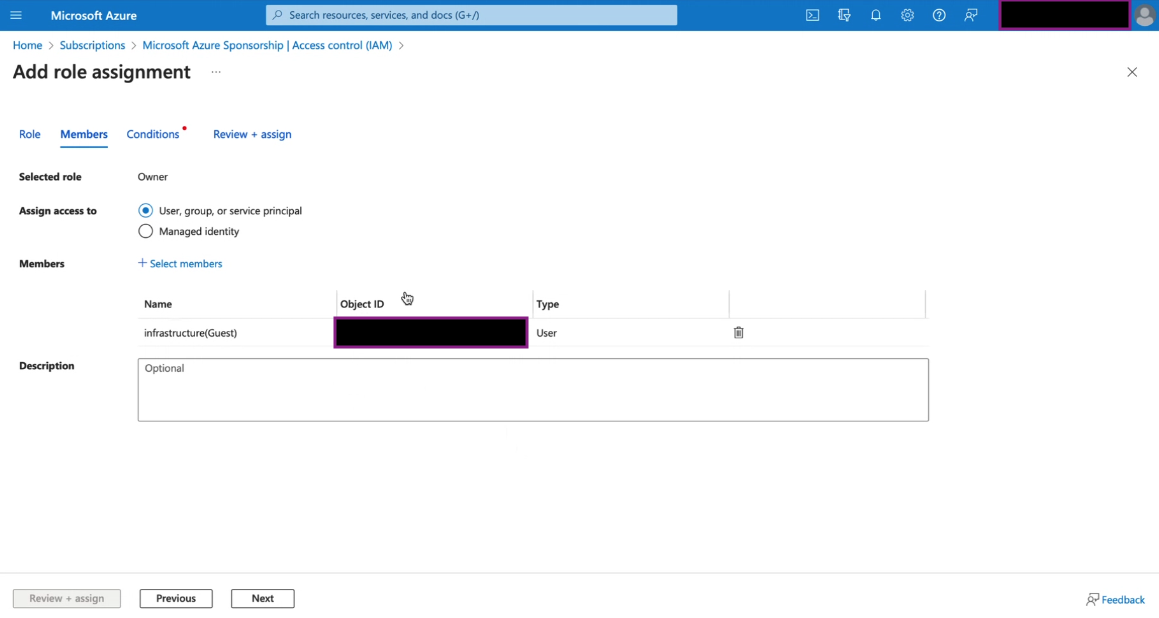
Select Assign access to: “User, group…” and Click on Select members and choose the infrastructure account
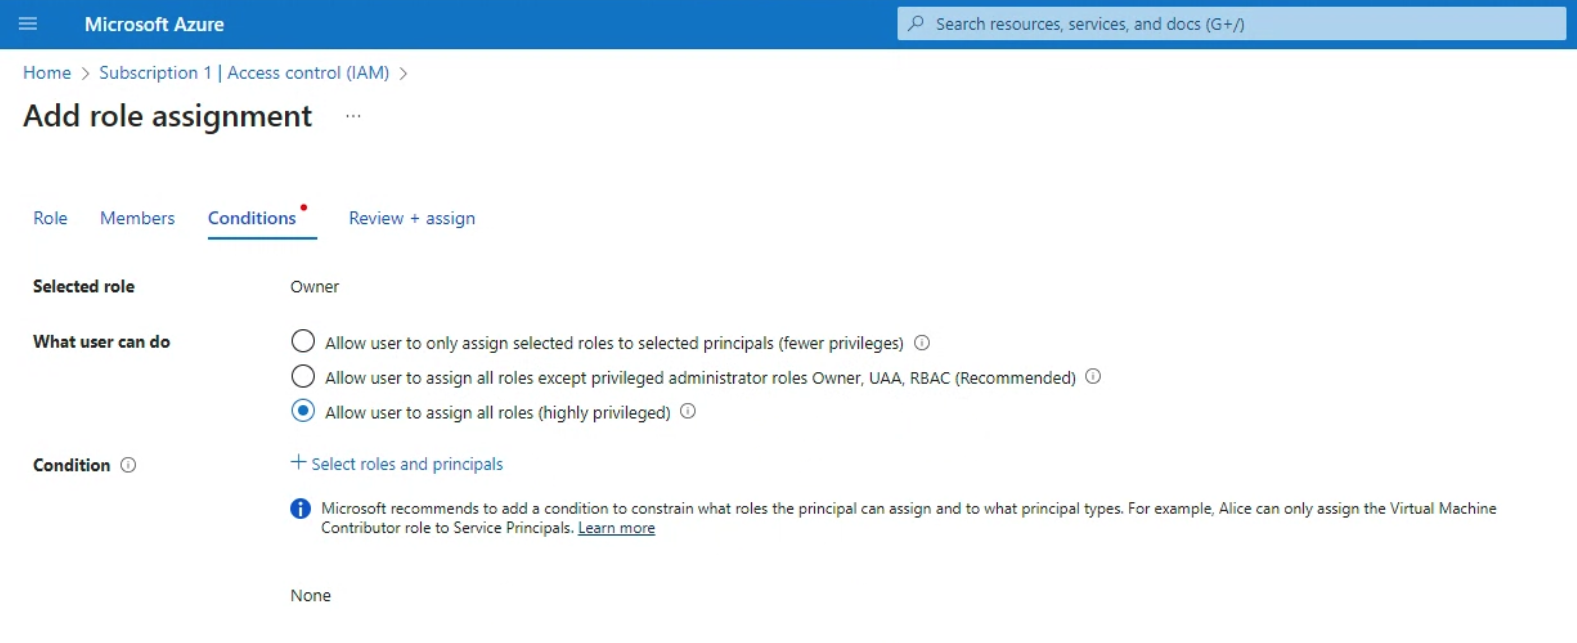
Select the more privileged level of conditions
Make sure there are NO conditions for this role.
We will need to be able to create another role using it and some resources. Limiting the role's functionality may prevent us from being able to deploy everything.
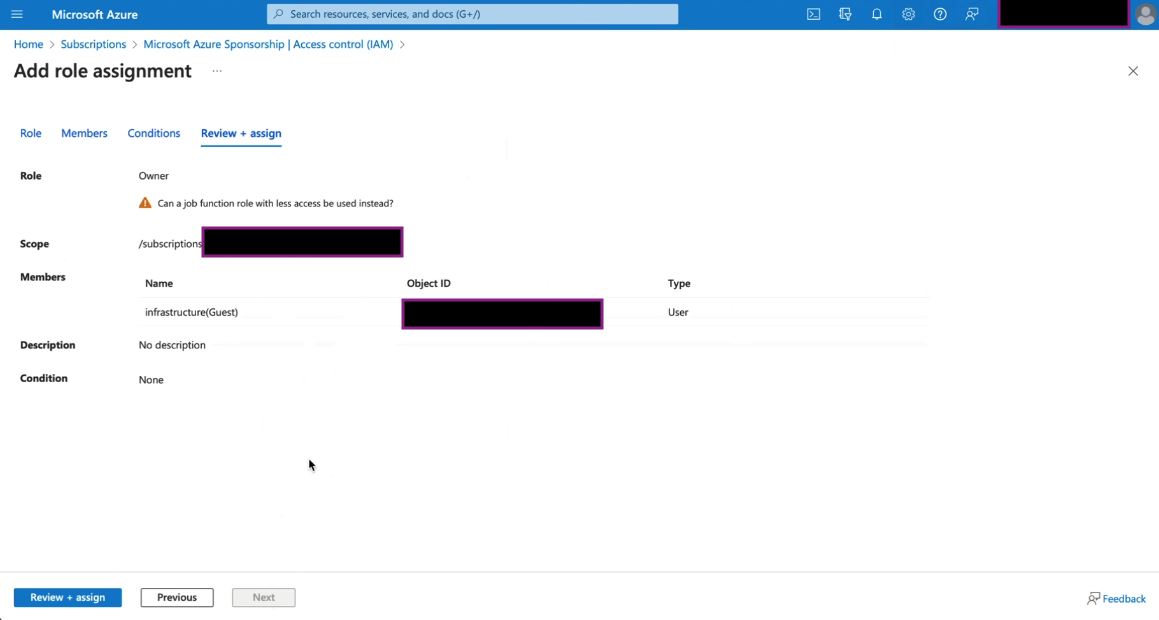
At the end Review + Assign
All steps are completed
You have successfully done ol the steps. We will get back to you with your Website Factory credentials within one week

Do you need technical assistance?
If you encounter any difficulties in applying for or setting up your Microsoft Azure account, send a message to civic@commitglobal.org, describe your problem and we’ll get back to you as soon as possible.