
Tell the world more about you
Sometimes the first step is the hardest, so let's start creating your new website with a simple page.
Any website is made up of pages on which the content is organized. To access the Page management section, select from the main menu the PAGES tab. In the Pages management dashboard, you can add, edit and delete pages. The actions are reversible, so even if you delete a page by mistake, you can retrieve it from the Trashed tab.
Step-by-step guide to creating a page
-
Access the admin panel.
Select the Pages button from the Main Menu.
Click the "Add" button.
Fill in the required Title field.
Activate the Publish button.
Click "Save"'.
-
Access the admin panel.
Select the Pages button from the Main Menu.
Click on the arrow next to the page you want to view.
Select the "View" option.
The page will open in a new tab of the browser you are using.
-
Access the admin panel.
Select the Pages button from the Main Menu.
Click on the arrow next to the page you want to modify.
Select the Editing option.
Edit the element you want to modify.
Click "Save".
Two types of page elements!
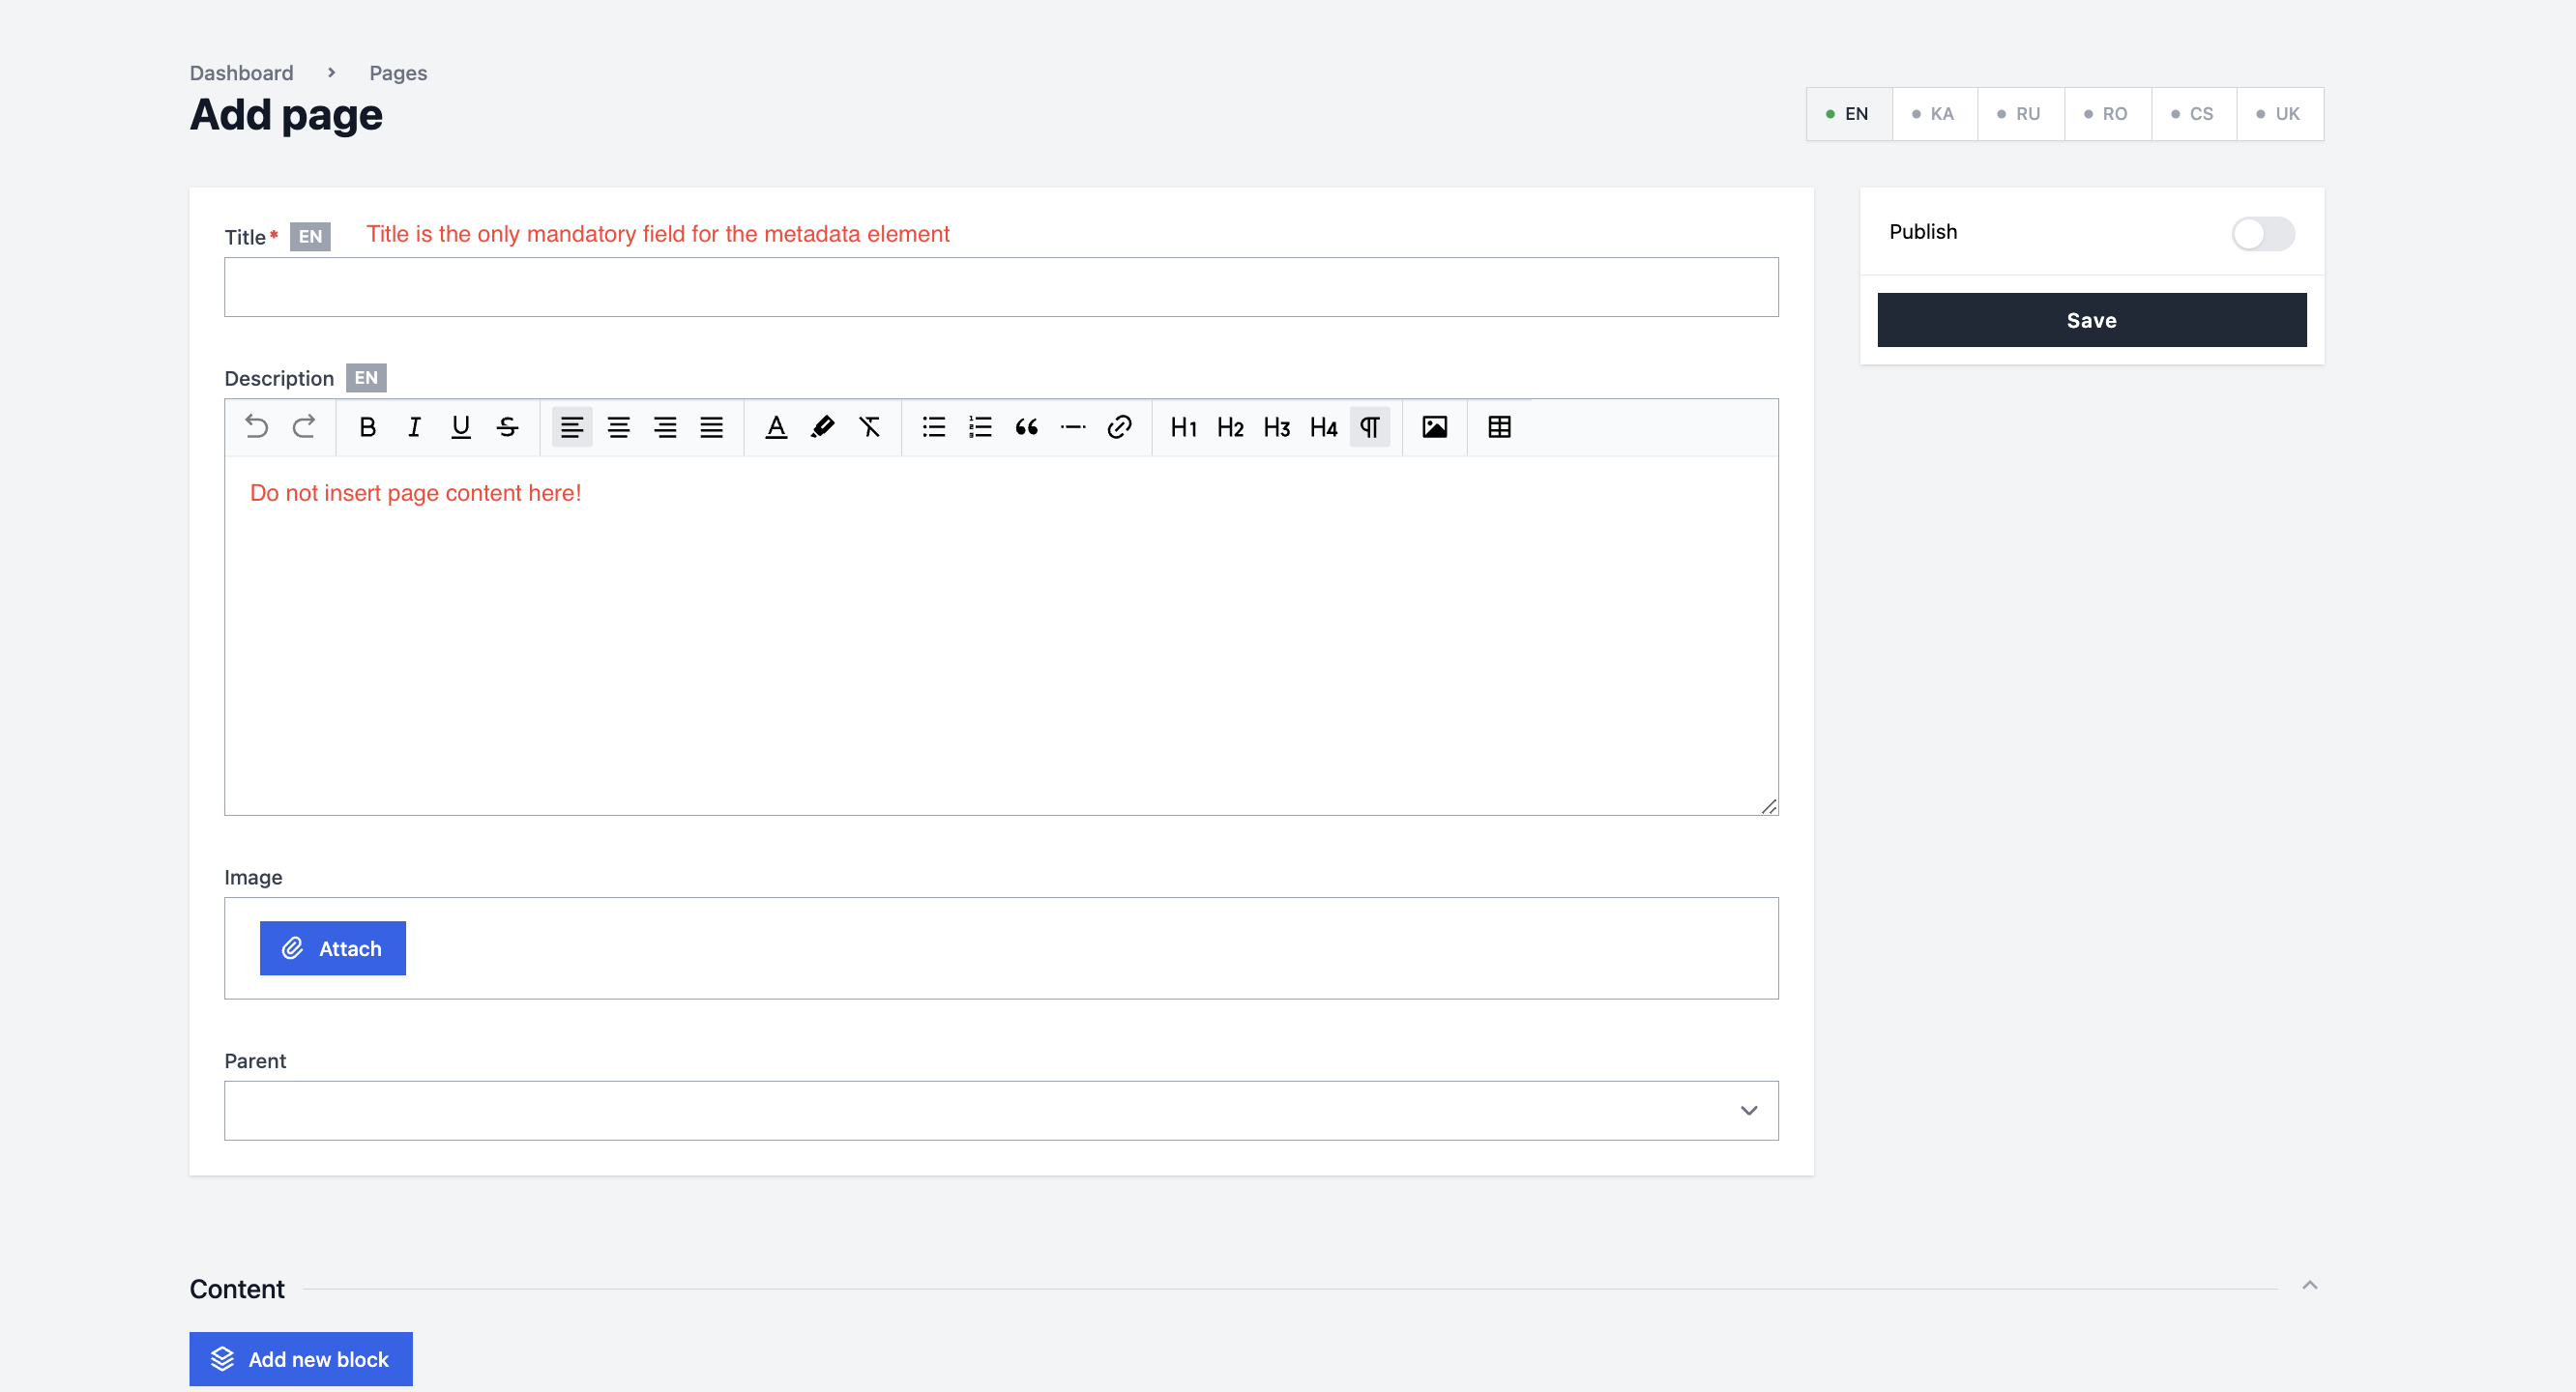
To simplify, let's categorize content elements into two types. First, there is metadata element and second, content elements! Metadata element includes the title, a short description of the page (if desired), and a picture. This information will appear on social media when the page is shared. You should fill out this information immediately upon creating a new page, as it is the first required step. Remember, this section is not for content, so do not include content information in the description tab. Below, you can see an example of how it looks.
Regarding content elements, this is where your website content is placed. You can find the details under the "CONTENT" heading below.

METADATA ELEMENT PAGE SETTINGS
Start by clicking the ADD button on the right of your screen, and a new metadata element window will open.
Fill in the title of the page. This title will appear on the top menu of the website, so keep it short and precise. For this page, use "ABOUT US"
Add a short description of the page. Write around 150 characters to describe your organization briefly. This description will not be visible on the website, but will appear in Google results below the link, and every time someone shares this link on social media. Below is an example of how this description is displayed - This function is why we call this element METADATA ELEMENT

If you want also to associate an image to this page, add it in the next field. Again, this image will not appear on the website but will be shown above the name and description when someone shares this page. Here is an example to better understand how this image will be displayed.

You can ignore for now the Parent field and go back up. Click the slider next to PUBLISH on the top right of the page, and then click SAVE. This will save everything you did up to this moment and will generate a temporary link for this page that is displayed below the title. Clicking on this link will help you see the progress you make on the page after each saving.
The page is now created and set, but it is blank. Let’s start working on the CONTENT Elements now.
CONTENT ELEMENT SETTINGS
When you click on the ADD NEW BLOCK button, a drop-down menu will appear. This menu includes all available blocks that can be used to create a page. Maybe at first it seems overwhelming, or maybe you think it is too restrictive, but just like with the Lego block, using only those 20 available blocks, you can create a wide diversity of content suitable for any page. Discover all blocks here, or continue with the creation of the ABOUT US page.
Start by adding a HEADER block. Add the title as you want to appear on the webpage and a short introductory text.
Next, add a TEXT block. Here you can continue with your text about the organization. To keep the page user-friendly, do not use long text, as an image will be added next to it in the next step.
Add an IMAGE block. Click the ATTACH button and upload your image. As this page tells the story of your organization, try to use an image that best represents your team and your journey. Here are some extra useful tips and tricks on how to best select and prepare an image for your website.
In order to have the image next to your text and not below it, you need to resize the two blocks. Click on the …. icon on the right side of the light gray tab of the two blocks. This will automatically resize the block to half of the screen. By grabbing the tabs by the left dark gray parts, you can reorder them according to your needs.
Now add a DIVIDER block. This is a visual element used to separate the blocks and better organize content on the page. You can choose the color of the divider according to the layout of the website.
After the introductory text and the image, add a longer text - your story, your journey, and your mission are some of our suggestions. Add a new TEXT block. This time also fill in the title and then include a longer text.
You have completed your first website page. Click SAVE on the top right corner and preview it by clicking the link below the page title.
Once you get more familiar with Website Factory, you can revisit this page and edit it to fit your content and your needs better.